There is nothing quite like cooking while you camp in the nature. This experience varies from person to person, depending on the equipment and food at hand as well as the level of your expertise. If you are a complete novice to camping, then you are probably asking, “Just how do I cook when I’m camping?” The short answer is:
- Prepare meals in advance
- Pack firestarters, food and cookware
- Cook using foil, charcoal, camp stove or wood fire
- Follow appropriate safety tips
- Clean after you’re done cooking and eating
Don’t worry, whether you’re an outdoors newbie or a seasoned survivalist, I have compiled an article with a lot of useful info. I will do my best to explain how you prepare for cooking in the wild, what essential ingredients you must have, what the exact cooking methods are, and then I will list a few advanced tips on cooking while camping.
Prepare for Camp Cooking
Before you head out, here are a few tips that you should follow. They will save you tons of time and energy as you prepare your meal in the wild.
- Maybe you don’t need to cook. A camping trip can be challenging as it is. You will deal with quite a lot, from insect bites to building your shelter for the night. Some food, such as hard cheeses and cured meats, does not spoil that fast when outside the fridge. So eventually, you can enjoy a full meal without the cooking effort.
- Meals should be simple. Remember, you’re not in your kitchen anymore. You don’t need to experiment or impress anyone. Everyone will thank you for the delicious one pot supper, but they will resent you if you try (and fail) to make something complex and impossible in the outdoors conditions.
- Prepare as much as you can in advance. Chop the vegetables at home, pack whole meals, store them in suitable container. Once at the campsite, you will have all the ingredients ready to be mixed and the meals ready to be heated. Also, bring the very minimal equipment for cooking. One good skillet can be enough to prepare all sorts of meals (bacon, vegetable, eggs, stew, and so on).
- Speaking of containers, use the cooler space wisely. For instance, you can freeze and pack meal cuts, which will both keep your cooler’s temperature down and will naturally defrost by the time you need them for dinner. Don’t forget to equip the cooler with a thermometer, so that you can monitor its cold at all times. Another useful trick is having frozen water bottles instead of ice. They will keep the cooler frosty, and you will also have a bottle of cold water within a reach.
If you don’t have a cooler or need to upgrade your old one, then look no further than Coleman Rolling Cooler. It has over a 1,000 good reviews on Amazon. Thanks to its insulated lid and walls, the ice inside does not melt for 5 days. It has an enormous capacity, you will have enough food even for the longest trip. And don’t worry about its weight, the cooler can be rolled around over anything on its sturdy wheels.

Take Care of the 3 Essential Parts of Cooking While Camping
Basically, all you need to start cooking at the campsite is fire, food and cookware. Let’s have a look at all three of them.
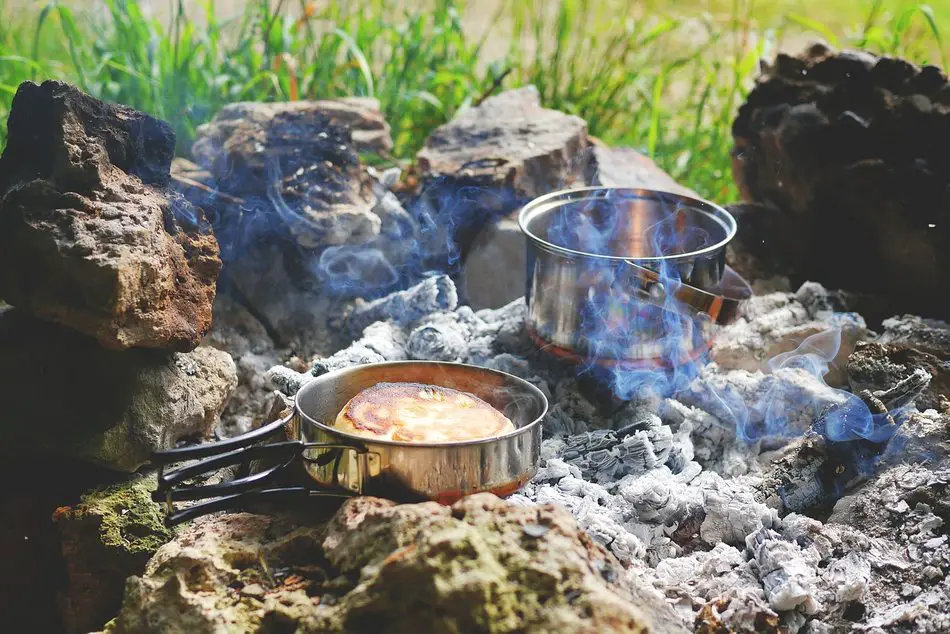
Fire
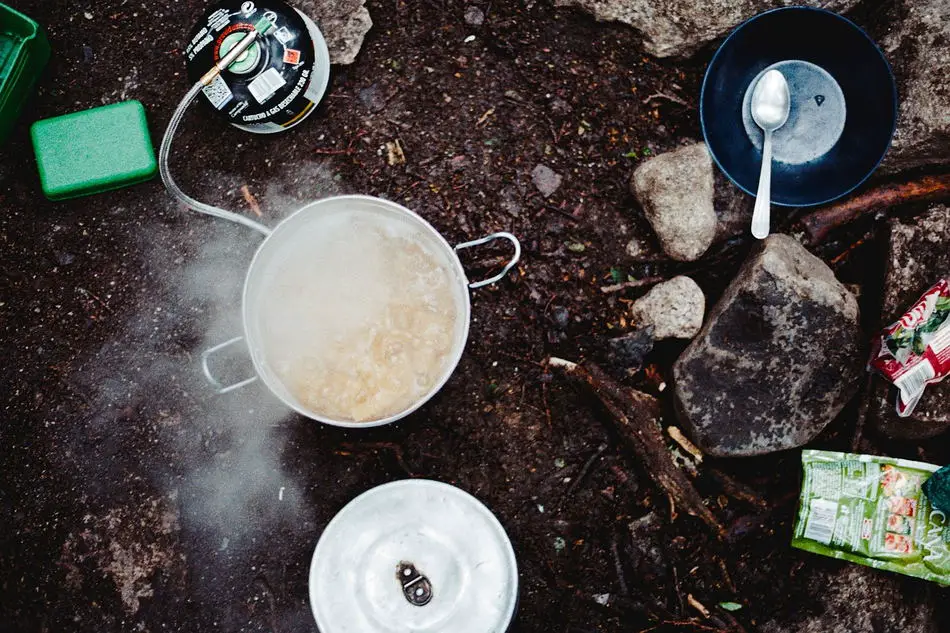
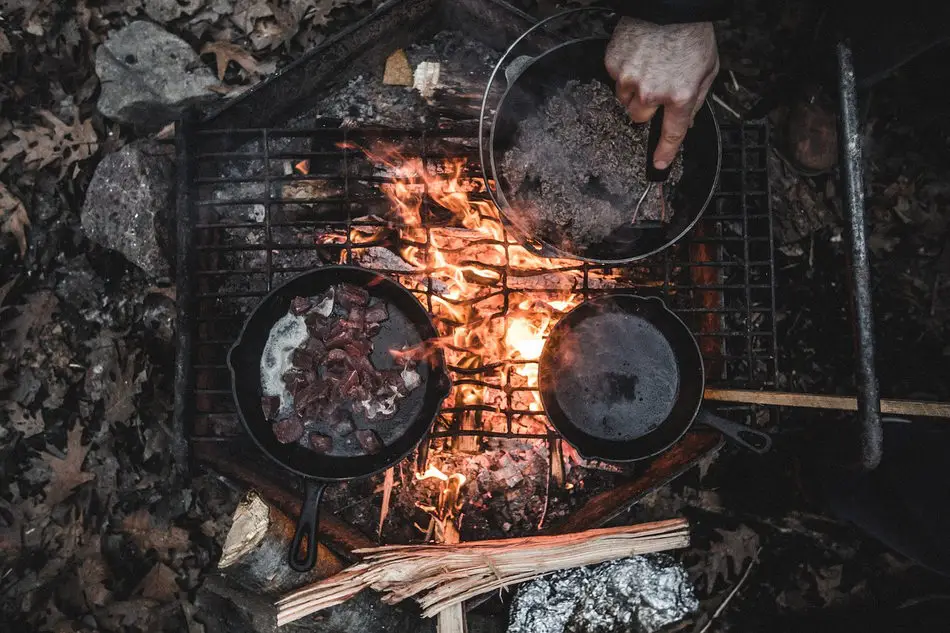
This is of course the center of your cooking activity – the campfire. You can choose to either cook over an open flame (keep in mind that you don’t have the same flame control as you have in your stove back home) or over the coals, which is just as good.
There are certain local conditions that can make starting a fire quite a challenge, such as damp weather or lack of firewood. Certain parks don’t allow wood gathering, so find out if it’s true in case of your camping destination and bring your own firewood.
If the climate is too wet, consider bringing a small stove. Stoves can be operated by propane, and some of them are actually very compact and foldable.
It is also highly imperative that you learn how to start a fire without matches or lighter, in case you did not pack them.
Food
The main question is probably how much food you can bring to camping. If you are backpacking, then you can carry substantially less than in the case of car camping. Whichever the case is, you still can enjoy cooking almost any meal you desire. Some people even make pizzas! Just make sure you bring a cooler, so that the perishable meal ingredients remain fresh at all times.
Of course, in case of backpacking, carrying a cooler is not always an option. You will need to rely on dehydrated food and water. Consider packing pasta and freeze-dried meals, they can be easily cooked on the go. For more energy and quick snacks, you can bring beef jerky and trail mix, they are a good source of calories and nutrients.
If you wish to learn more, I have prepared a complete checklist of food to pack for camping.
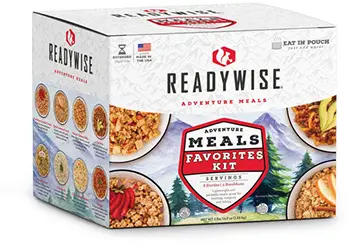 ReadyWise has an entire section dedicated to outdoor and camping food. There is so much delicious food to choose from that anyone can find something tasty and nutritious to take on your next camping trip. Cheesy lasagna, noodles with beef, teriyaki chicken, apple cinnamon cereal, you name it!
Cookware
Again, just like in the case of food, it’s backpacking versus car camping. If your car is parked close to the campsite, then by all means, bring the heavy, cast-iron cookware. It’s very durable and reliable. I would recommend the following 3 pieces, they will cover all your cooking needs and plans.
- Pan – a classic and trustworthy companion for any outdoors person, can be used to cook meats, eggs, veggies, and so forth.
- Pie iron – who can resists a nice grilled sandwich while camping?
- Dutch oven – a tightly closed iron-cast pot, terrific for many possible meals, such as soups, stews, and even cornbread.
As for the backpackers, go for a pot or a pan that are made from titanium or aluminum. They will suffice, because in any case you will be carrying lighter foods that don’t require much preparation. A pan can also substitute for a plate, so you save a lot of weight with it.
There are a few cooking supplies that you should bring along as well. It’s always necessary to have lighter fluid and matches to start the campfire. Aluminum foil is another necessity, especially if you plan to bake a few root vegetables, such as potatoes. You can simply wrap them in foil and place between the coals for a classic fireside treat. Or wrap the fish as you cook it, to prevent ashes from spilling into your meal. And don’t forget to pack spatula and tongs, they are your number one friends when you need to get the food off the fire.
Amazon has a Gold Armour Mess Kit, and for an extremely low price you get 17 pieces of cookware to use and enjoy on your next backpacking adventure. This high quality set includes: frying pan, bowls, ladle, stainless utensils, non-stick pot, fire starter, and more. All items can be conveniently stored together in an included bag and easily carried with you.

Cook Using One of These Proven Methods
The basic and most common method is cooking over the fire, it was already mentioned earlier. It’s simple and effective, and eventually delicious. But here are a few more cooking methods, some of which are using the aforementioned cookware.
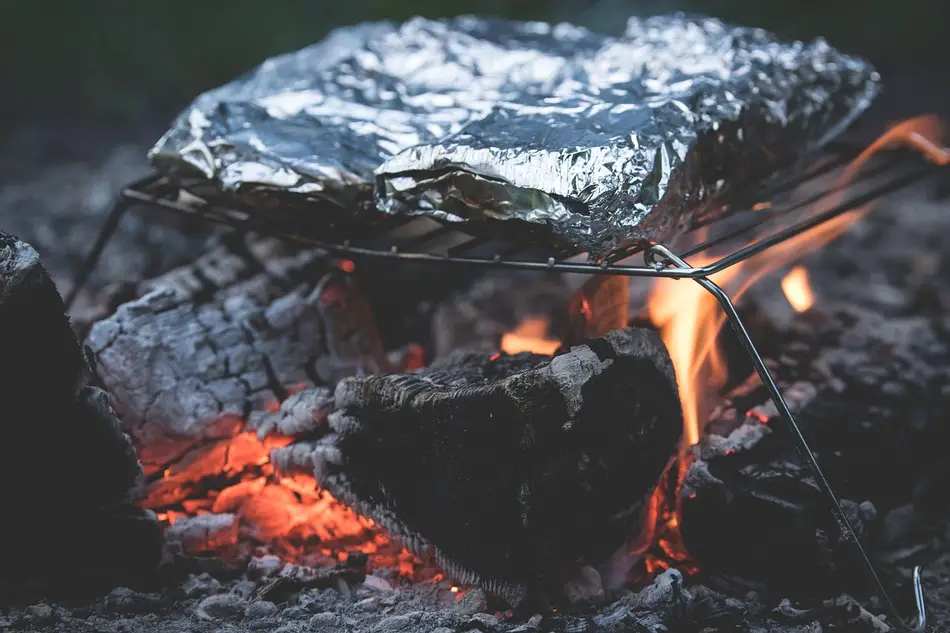
Foil
This method requires using aluminum foil, and not of the flimsy kind. Get a thick and large piece, enough to completely wrap the food. Fold the edges and seal the food tightly, but not too tight – some room should be left when the food expands and produces steam as it’s being cooked. Place it on glowing coal and rotate once in a while.
You can cook almost anything this way – meat, root and other vegetables, you can even add seasonings and sour cream. Experiment with the ingredients, use all kinds of seasonings, try sea food, chicken, pork, hotdogs, fish, try any possible vegetable and even desserts. This is a fun way to cook a meal that guarantees interesting culinary surprises.
Dutch Oven
Dutch oven cooks best when you surround it with charcoal, by putting 3 times more pieces on the top than beneath the oven. Naturally, keep the lid closed. Dutch oven requires a good seasoning with oil before you start cooking. If you wish to make the cleaning process easier after you’re done cooking, then wrap the oven’s outer surface with foil.
Here is a video demonstration of Dutch oven in action:
Tin Can
For this basic method, you just need a really big tin can. Fill it with the ingredients in layers, starting from meat at the bottom and placing seasonings and vegetables at the top. And then just cover with foil and cook.
Camp Stove
Stoves are pretty easy to use and don’t require much explanation. If you planned your camping trip correctly, then you probably packed a stove. The most popular stoves operate on white gas or propane. There is also the option of the cheap kerosene fuel and the light butane burner stoves that can be carried in a backpack.
A word of caution: don’t use a stove on a closed area such as a tent or a building, or near the campfire. A stove should be only used in the open, away from any additional heat source.
 BioLite Campstove (available on Survival Frog) is a highly recommended and reliable stove, in both camping and survival situations. It’s a set that comes complete with a stove, a portable grill, a smart combination of a kettle and a pot, and even a FlexLight. It has tons of advantages that improve your campsite cooking, so click the image to learn more.
Vagabond Stove
If you don’t have a previously purchased stove, you can improvise one. Take a large can (about a gallon) and remove its lid with a can opener. This lidless end will serve as the stove’s bottom. Carefully cut a small square from the side that connects with the bottom, three by three inches should be enough. Cut only two sides! Leave the square attached, it will serve as a ventilation door once you bend it out. Then make a couple of air holes opposing the door. You should use appropriate tools as you cut and punch holes, as well as gloves.
Now you can place this makeshift stove over a small fire or a buddy burner (see below). Don’t touch it as you cook, the vagabond stove will be really hot. The door you made earlier will serve as a heat control.
Buddy Burner
Speaking of improvisations, here is another method of making a heat source for your camp cooking. All you need is a small can (like from a tuna or a pet food), paraffin wax, and some corrugated cardboard. The latter should be cut into strips and coiled inside the can. The cardboard’s strips should be lower than the can’s edge. Then you melt and pour the wax over the cardboard. After the paraffin wax hardens, you can light it and enjoy a long-lasting source of heat.
You can use this buddy burner with the aforementioned vagabond stove. Or how about this trick – place at least 4 nails into the ground around the buddy burner and then place a pan on them. This simple patent will serve you as an emergency fuel, and you can cook almost anything over the buddy burner. Be careful when you are done cooking, the whole setup (vagabond stove included) gets extremely hot. Put a lid over the burner to smother the flame. The liquid wax is also harmful to touch, so wait until it hardens again. You can use it later for more cooking.
Wood Fire
Wood fire is a classic way of cooking at the campsite, with a lot of possible uses for a variety of meals and recipes. Make sure that the flame suits whatever meal you choose to make. For instance, making a stew calls for a smaller flame, while a quick boiling requires a large one. If you intend to broil or fry, then laying the cookware on the hot coal should be enough.
Using fire, of course, requires additional caution. There should be no debris in wood fire’s vicinity, nor should there be any branches hanging over the spot. Place a ring of rocks around the fire, and have water and a survival shovel prepared at any time. If you collected more than enough wood, keep the pile in a good distance from the fire. Use only dry wood, not fresh or green, otherwise you will mostly get smothering smoke and not the actual fire.
A nice and lasting fire is usually built with 3 types of wood/fuel. First there is the tinder, which is usually bark, leaves, dry grass, twigs, and so on. These ignite immediately. Then you have the inch-long sticks known as kindling. And finally there is the bigger wood that you collect in a separate pile and use it as a fuel to keep the fire constantly burning.
To start a campfire, you need to build a small pile of tinder in the middle of the fire ring. Shield a match from the wind and set the tinder on fire. Gradually place additional tinder while gently blowing at the fire’s foundation. When you see that the tinder is steadily burning, add kindling. The whole structure should be kept in one piece, but with enough air access, since fire needs oxygen to breathe. Place more and more kindling, switching to longer twigs as you go. And finally, when the fire is fully burning, place one fuel piece. Keep the fire going by adding more fuel now and then, and make sure there is always enough air access.
Charcoal
Charcoal on its own is a great source of heat, since one piece can provide at least 40 degrees of heat. You will know when it can be used by its color: once it’s ready, it gets red in the dark and whitish in the light. You can use it in a fire ring or a grill, and it will constantly supply you with enough heat necessary for the campsite cooking.
If you want to get the charcoal hot as quickly as possible, place it inside a can that had both of its lids cut off. Put a paper under the charcoal and ignite it. Once the coals are ready to be used, remove this improvised chimney with a pot-holder and spread the charcoal over a larger surface. Now you can cook over it.
Generally speaking, cooking over the coals or directly on them is usually the preferred way. It does not matter whether it’s charcoal or wood, the important part is that the heat is more consistent and no smoke is produced. The food won’t end up being undercooked or burnt.
Follow These Additional Cooking Tips
Now that you have an idea just how you can cook while camping, here is a collection of advanced tips that you can use.
- It’s more advisable to bring a pita bread than the regular one. It keeps its shape better and holds the food inside without any food falling out.
- As mentioned earlier, there is food that does not require cooking, and you can bring it along for that extra energy between the meals. I am talking about dried fruit, granola bars, trail mix, and so forth. You can snack on them on the go and get an energy boost when you need it.
- If you are making hamburgers, a good tip would be making a small hole with your finger right in the center. The hole will disappear during the grilling process, and the hamburger will be evenly cooked at the edges as well as in the middle.
- You can save a lot of time and effort by making soups, chili, stew and other meals at home, freezing them, and then just reheating at the camp.
- Ziplock is your best friend. You can put the necessary ingredients of every dish in separate bags, label them and then save the hassle once you’re at the campsite. You can even freeze food in the ziplock backs. And if you used only a part of a bag’s contents, you can seal it right back.
- Is your cooler leaking? There are no technicians in the woods. Melt some paraffin wax on both sides of the leak and let it harden.
- Cleaning the cookware is another hassle. So here is a useful trick – before you place it on the fire, cover the outside with some liquid soap. This will also minimize the fire and smoke damage to your pots.
- If your cookware has some burnt food stuck to it, cover the bottom with water, drop a little bit of a dish soap and boil. You can do it as you eat, to save time.
- If possible, get a block ice. It stays frozen longer than the cubed variety. It is also advisable to replace ice from time to time, to keep the cooler chilled and prevent food from going bad.
- Additionally, try not to open the cooler too often. Better yet, get two separate coolers, one for the beverages and one for solid food. The food cooler will stay cold, because it won’t be opened on an hourly basis.
- Sometimes there is a less than pleasant odor emanating from the cooler. Or to put it plainly, it stinks, even if the food didn’t spoil. To get rid of the smells, combine baking soda with water, and wipe the cooler with this mixture.
- One of the best campsite cooking tips is to always use a cover or a lid. When your pot is covered, you save fuel, since the dinner is made much quicker. Additionally, this will protect your food from unwelcome insects and debris.
- And speaking of unwelcome guests, you really should store your food deep in the tent, or hang it from a branch. This way a ground animal won’t be able to reach it.
- You can also hang soap from a tree in a sock, so that it will always be kept free of dirt.
- Before grilling, smear some oil on it. This way the food won’t stick to the grill.
- When you make a dinner with the aluminum foil, add ice cubes into the foil. Your meal won’t burn and will remain moist during the cooking.
- You need to pack lightly and reuse some of the stuff that you bring. For instance, plastic bottles can also be used as dispensers for seasonings, sauces, oil, and so on. Another example is using the pots as bowls in which you will mix the ingredients, so a separate cookware is unnecessary. Got a big old coffee pot? Bring it along to use to make hot water for cooking, for dish washing and for hot beverages.
- Don’t have an oven mitt to handle hot food and cookware while camping? Not a problem, just put on a suede or leather work glove.
- Planning an outdoors chicken BBQ? My best advice is to start grilling and add the sauce only half way through. This way the chicken meat will be better flavored, and the sauce won’t burn on it.
- Matches are a necessity and should always be kept dry. You never know when a damp weather will sneak up on you. Keeping them in a waterproof box might not be enough, so cover their heads with wax. When you’ll need to light them, just scrape the wax off and use them.
- Many of us can’t imagine cooking without margarine or butter. But rather than bringing a stick or a tub, go for a squeeze bottle. It’s more convenient to use, and if the butter or margarine are stuck inside due to the cold temperature, just submerge the bottle in a warm water for a couple of minutes.
- If it’s your last day of camping, combine all your leftover vegetables and meat into one big omelet. Eggs go with everything! This will make a delicious breakfast, and you won’t have to carry any leftovers back home, or throw them away.
- If you taste the food during cooking and notice that it was salted too much, then throw in a peeled potato for a quick solution. It will absorb the extra salt as you finish cooking the meal.
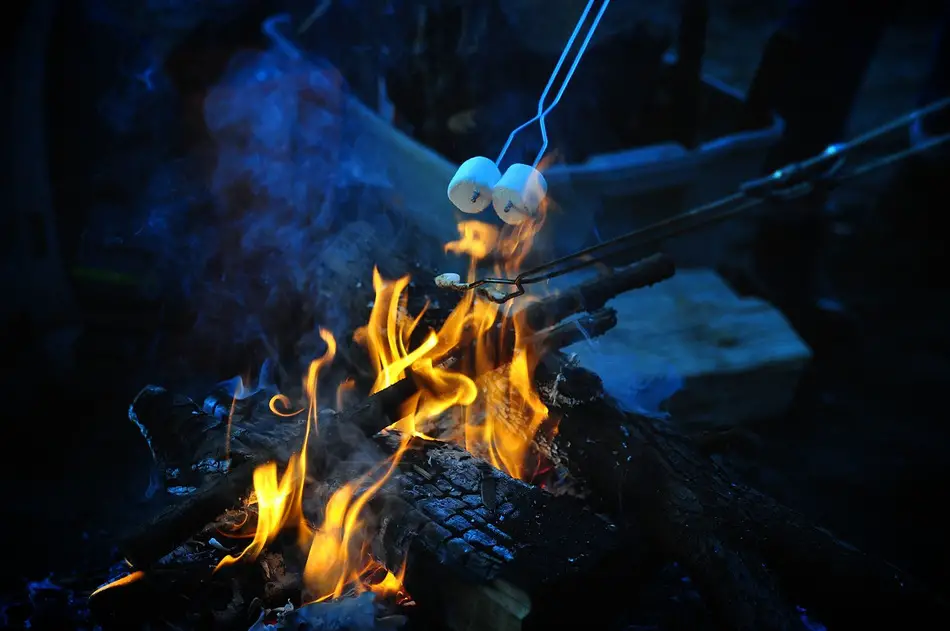
- Marshmallows are a fun and classic fireside treat, but the non-brand ones tend to stick together when they are stored in a bag. The solution is to sprinkle them with powdered sugar.
- Watch for designated areas. Some of the parks have picnic tables and grates, so maybe you need to pack less. Don’t forget to clean this public area after you are done eating.
- If there are no public tables and fire rings, create your own designated preparation area, but make sure it’s far enough from the tent, at least a hundred yards. You don’t want any delicious smells, spillings and leftovers near the place where you sleep, since this might attract the wildlife.
- Avoid getting food stains on your clothes or food aromas into their fabric. If it was unavoidable, change your clothes before going to sleep or getting back on the trail, especially if you are in a bear country.
Clean After You’re Done
I have mentioned a few cleaning-related tips earlier, but this subject deserves a separate heading. The outdoors probably have much more bacteria than there are in our sterilized homes. You must clean your cookware and food preparation surfaces after you are done cooking. This way you will also make sure that you don’t attract any wild animals.
Thoroughly wash you dishes and utensils. The best way to do it is with three separate bins. Fill two of them with warm water and the third one with water and some bleach. Wash the utensils, dishes and cookware in the first bin, rinse in the second one, and then rinse once more in the bleach mixture. Let them dry and then store them.
The eating area should also be cleaned once you’re done with the dinner. Pick up every bit of trash, food, wrappers, and so on. Keep the nature clean, so that the following visitors will also enjoy the camping area. Make this seemingly tedious task into a team challenge, and you will be done in minutes.
Final Words
Hopefully, you now feel ready and confident about your outdoors cooking skills. Eventually, nothing beats a real life experience. Take whatever method or tip you want from this article, but also do not be afraid to experiment a little. Each and every one of us has our special preferences and recipes, and you should try them in the wild as well. So go ahead, pack that pan and get ready to start cooking with the campfire. Whether you’re a backpacking beginner or a veteran hiker, anyone can cook. And this will be an unforgettable meal!
